How to Synchronize Azure SQL Databases using Cotega Data Sync
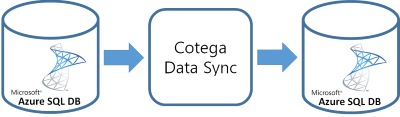
Cotega Data Sync is a high performance method of synchronizing data one-way from one source SQL Server or Azure SQL database to another. The following document outlines how to synchronize data from an Azure SQL database to an Azure SQL database. Cotega Data Sync uses a technology called sql integrated change tracking to efficiently determine changes made in your tables. The advantage of integrated change tracking is that it has very little impact on your database and can get data changes very quickly allowing synchronization to complete very quickly and requires no changes to the schema of your source database. In addition, Cotega Data Sync uses various bulk updating techniques that allow for extremely fast data transfer.
Requirements
In order to use Cotega Data Sync, you will two Azure SQL databases (source and target) where the source Azure SQL database is v12 or higher.
Configuring Data Sync
To configure data synchronization, there are three main tasks that need to be completed:
- Register the source database and enable Integrated Change Tracking
- Register the target database
- Register the Tables that are to be Synchronized and Create them in Target Database
Step 1: Register the source database and enable Integrated Change Tracking
In this step you will register your source database with Cotega and turn on the Integrated Change Tracking feature in your source database.
- Go to the cotega dashboard and ensure that you have added the source database you wish to synchronize from using the "Add Monitoring Agent" button
- Choose the "Azure SQL Data Sync" button
- If Integrated Change Tracking is not enabled in your source database, you will see a button to enable this called "Enable Change Tracking in Source Database". Either click on this button or see the section below titled "Configuring the Source Azure SQL Database Manually" to enable this manually.
At this point, the button "Enable Change Tracking in Source Database" should no longer be visible and you can now move to the next step to register your target database.
Step 2: Register the target database
In this step you will register your target database with Cotega.
- Choose "Register Target Database" button to open a dialog to allow you to enter the details of the target database you want to synchronize.
- Click Save.
At this point you should see your target database listed in the combo box for "Target Database".
Step 3: Register the Tables that are to be Synchronized and Create them in Target Database
In this step you will register each of the tables that are to be synchronized as well as to create them in the target database.
- Choose the "Register Table" button to open a dialog to allow you to enter the details of the source tables you want to synchronize.
- Enter the details of the table you wish to synchronize. If you wish to be notified of errors, choose "Enable Error Notification". Please note, that since data will be inserted, updated and deleted, the SQL user will need to have all of these privileges in the target database.
- If you have not enabled Change Tracking in the source database for this table, please either choose "Enable Change Tracking for this Table" or follow the instructions below to manually enable this in the section "Configuring the Source Azure SQL Database Manually".
- It is highly recommended that you let Cotega create the target tables for you as there is also an associated SQL Server TVP (Table-Value Parameter) that will be created. To do this choose "Configure Target Database". Please note that if a table already exists, it will not be overwritten and this process could take a minute to complete.
- Click "Save"
- Repeat the previous step for each of the other tables you wish to synchronize
- At this point your system is ready and synchronization will run every 2 minutes.
Viewing Historical Data Sync Logs
After you have executed a sync, the results will be logged. To view these logs including total rows synchronizes and errors:
- Login to the Cotega Dashboard
- Choose “Azure Data Sync”.
- Click on "View All Logs" to view all logs for all tables, and choose "View Logs" for individual tables to view the results of a specific table.
Re-Sync Data from a Specific Table
In the event you wish to execute a full resynchronization of a specific table:
- Login to the Cotega Dashboard
- Choose “Azure Data Sync”.
- Click on "Re-Sync" for the specific table and within 2 minutes the synchronization of the full data will be initiated.
Configuring the Source Azure SQL Database Manually
To enable this run the following command against your source database (and entering your source database name):
ALTER DATABASE [TARGET DATABASE NAME]
SET CHANGE_TRACKING = ON
(CHANGE_RETENTION = 2 DAYS, AUTO_CLEANUP = ON)
Next execute the following query for each of the tables you plan to synchronize:
ALTER TABLE [TABLENAME] ENABLE CHANGE_TRACKING WITH (TRACK_COLUMNS_UPDATED = OFF)
FAQ
Question: My synchronization configuration failed. What should I do?
Answer: In the event configuration failed, please contact us so we can help resolve the issue.
FAQ
Question: Why doess Cotega create a SQL Server TVP (Table-Value Parameter) in my target database?
Answer: After testing various bulk updating techniques, it was found that using TVP's was the most performant way to synchronize data. Data changes are first uploaded to the TVP at which point they are then merged into the target table.